

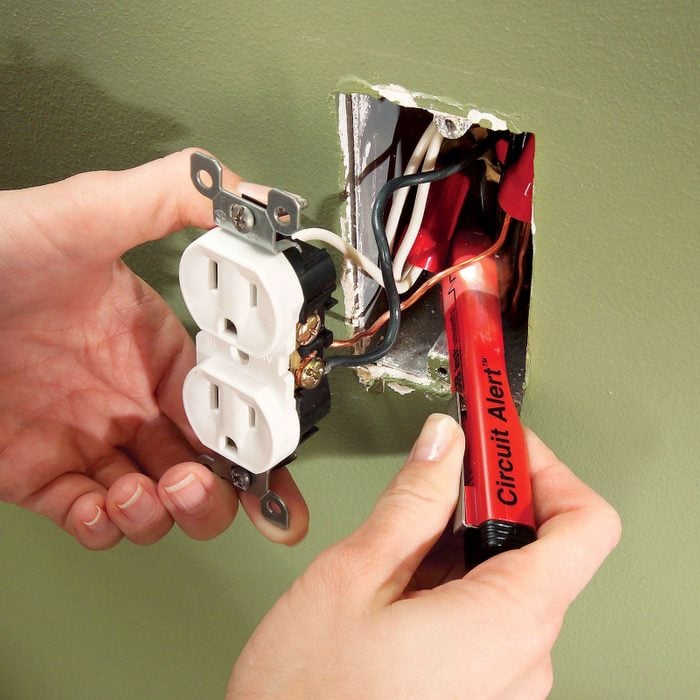
Incorrect Use of a Non-Contact Voltage Tester
Electricians always carry non-contact voltage testers Along with them, you should get one as well. These items are affordable and simple to use; however, if not done correctly, they lose their purpose. Follow these steps to do it properly:
Initially, confirm that your tester functions correctly by testing it against an active electrical source. Position the tester close to an energized device or plug it into a socket (utilize the narrower opening as this represents the 'live' wire). Should the tester fail to illuminate or produce sound, replace the batteries and attempt once more. Once assured of the tester’s functionality, identify and switch off the relevant circuit via the main panel; then use the tester again to ensure the power is indeed disconnected.
Prior to returning the tester to your pocket and before you begin working on the de-energized circuit, verify it once more on the previously used live circuit. This step ensures that your tester remained functional during use. Always follow this sequence: Test, Use, Test.
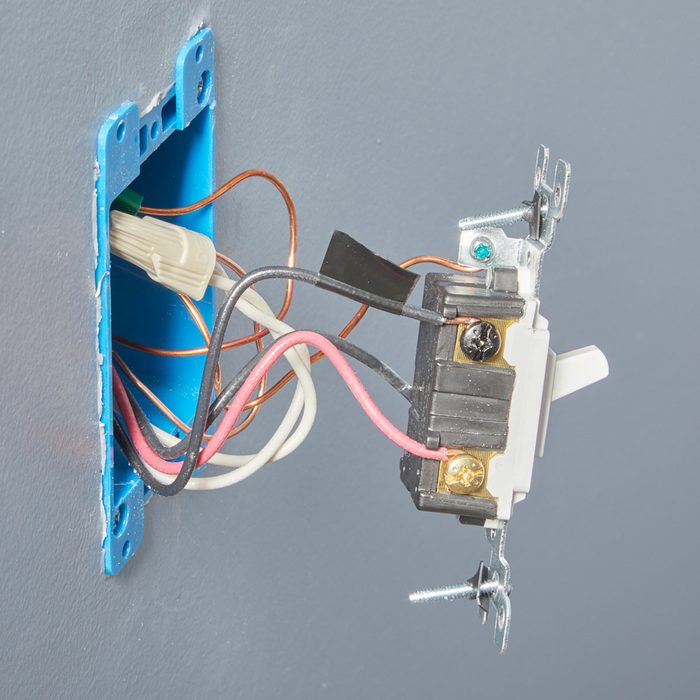
Cutting Wires Too Short
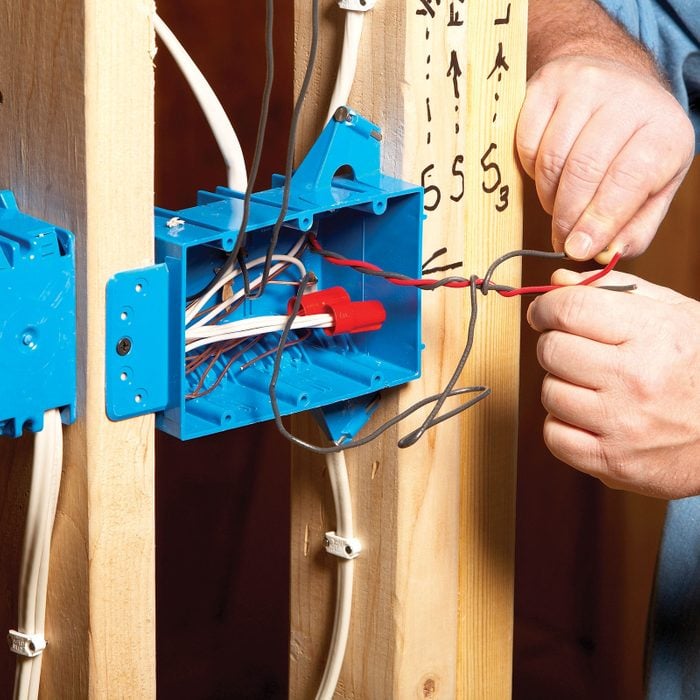
Connecting small wires within an electrical box, often referred to as splicing, can be challenging. A poorly executed splice might result in dangerous situations like electrical arcing or fires. Therefore, according to the National Electrical Code (NEC), each electrical box must have at least six inches of “free conductors.” However, despite beginning with ample wire length, these conductors frequently become shorter due to replacements and upgrades performed during the lifetime of a house.
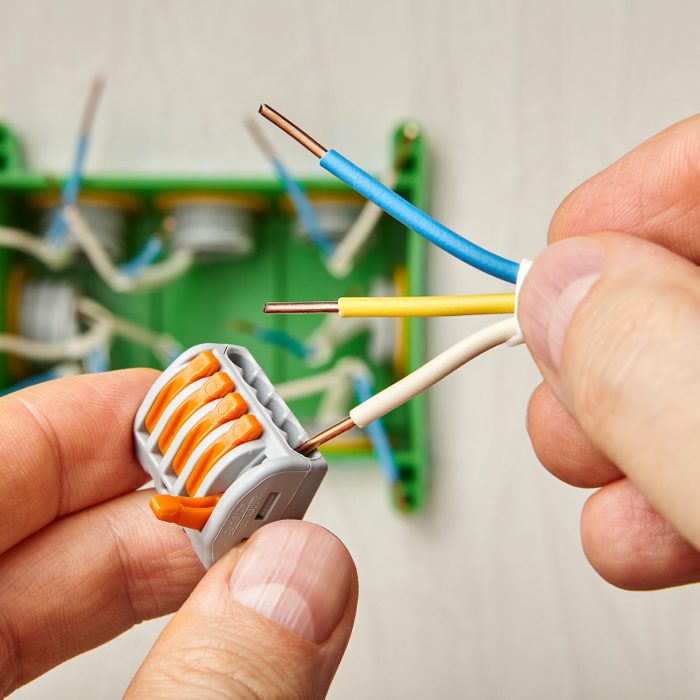
To address this issue, attach a pigtail, which is a brief length of wire utilized for extending an electrical connection. For simpler splicing, employ a push-in connector or a lever nut, also known as. Wago , instead of attempting to twist with a conventional wire connector.
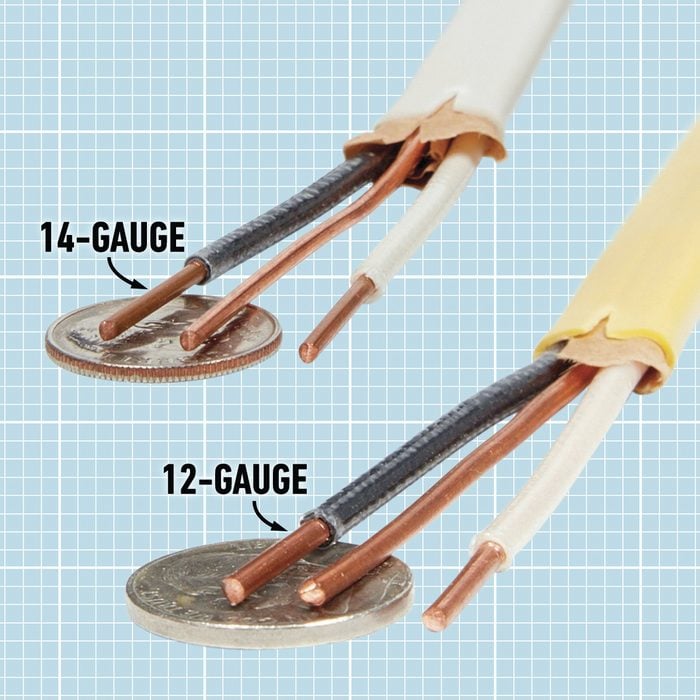
Utilizing Incorrect Wire Sizes
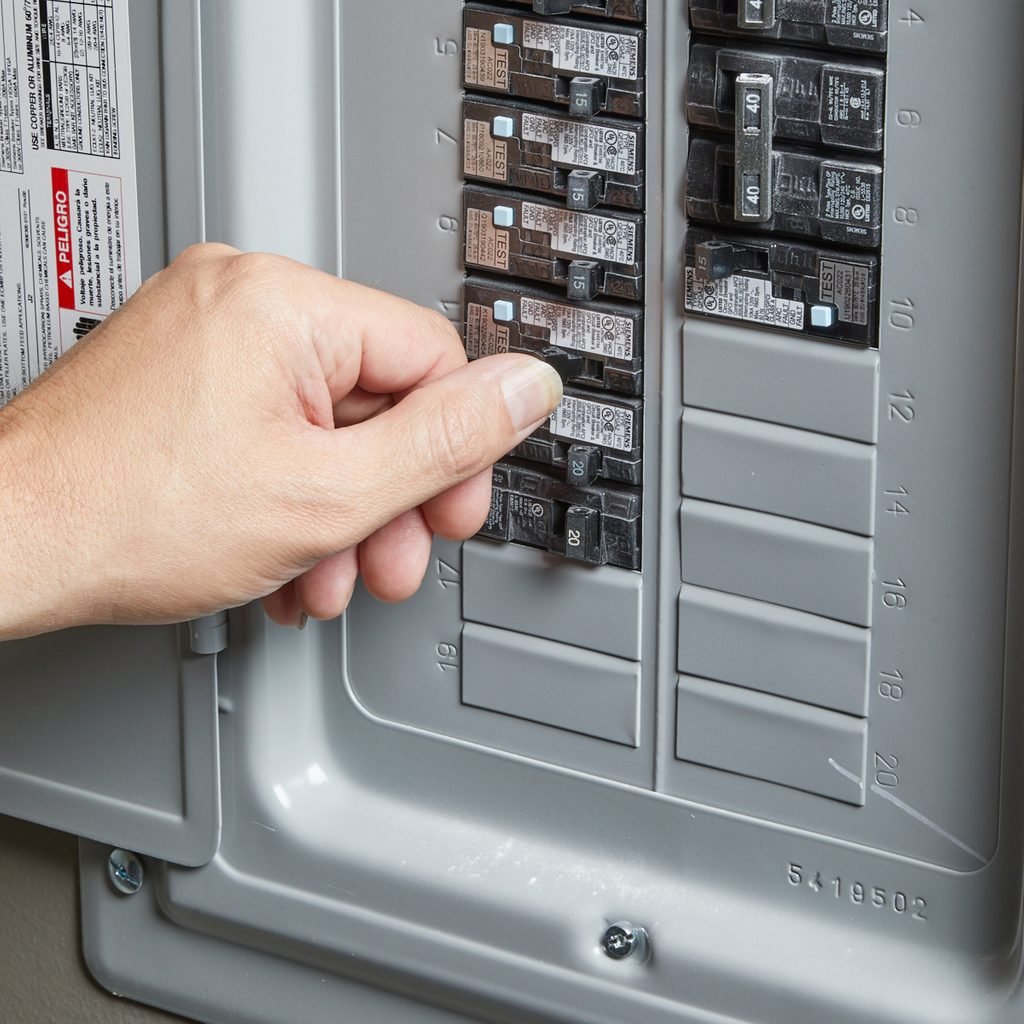
The diameter of electrical wires, also known as their "gauge," determines how much current they can safely carry. Using too-small wires causes overheating, but unnecessarily large wires are a waste of money. When doing DIY electrical work, it is important to match the right size wire to the circuit.
Depending on the age of your home, you'll likely see 20-amp circuits In your kitchen, bathroom, and laundry room, as well as 15-amp circuits in bedrooms, living rooms, hallways, and other areas, the circuit breaker indicates the size of the electrical circuit. For 15-amp circuits, use 14-gauge wiring; for 20-amp circuits, opt for 12-gauge wiring. Larger appliances such as electric stoves and dryers, along with heaters and other substantial devices, require thicker gauge wires.
Electricians dedicate many years to mastering the intricacies of wiring sizes for various electrical demands, so if you're uncertain about how to proceed with your setup, it’s best to contact a certified professional.
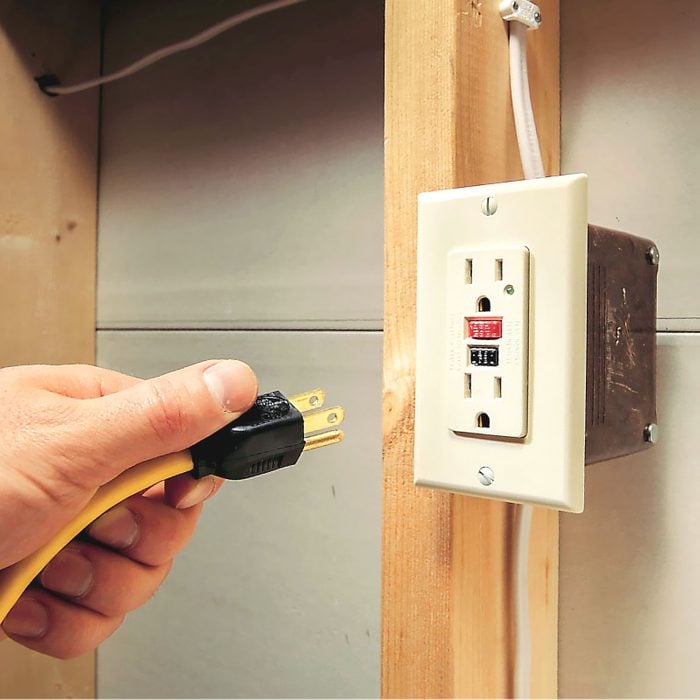
Not Utilizing Ground Fault Circuit Interrupters (GFCIs) and Arc Fault CircuitInterrupter Devices (AFCIs)
Ground-fault circuit interrupters (GFCIs) shield individuals from electric shocks, whereas arc-fault circuit interrupters (ACFIs) safeguard your residence against potential fire hazards. The National Electrical Code (NEC) mandates both devices for different areas and circuits within your home based on which specific NEC edition was current at the time of construction.
Typically, install GFCI protection in areas like bathrooms, kitchens, laundry rooms, basements, outdoor spaces, and anywhere else where moisture might occur. Regarding AFCIs, the National Electrical Code mandated their installation in bedrooms starting in 1999 to safeguard against fire risks for individuals who are asleep. Over time, this requirement expanded to encompass almost all rooms within your home (excluding bathrooms and garages). For precise details, check with your regional electrical codes authority.
Both AFCI and GFCI protection Can be supplied by breakers or receptacles. If opting for a receptacle, it should be installed as the initial outlet following the panel and connected properly to safeguard subsequent outlets downstream.
Utilizing Excessive Ground Fault Circuit Interrupters (GFCIs) and Arc-Fault Circuit Interrupter Devices
Simply because the NEC mandates GFCI and AFCI protection does not imply that you must purchase separate individual GFCI and AFCI outlets for each location. You can opt to utilize a single receptacle fitted at the initial outlet position or employ a breaker to safeguard the whole circuit instead.
One time, a buddy asked for assistance because their bathroom outlet wasn’t functioning. This particular socket didn’t have Ground Fault Circuit Interrupter (GFCI) capabilities, despite regulations mandating such safety features in bathrooms. Could an error from the electrician who installed her home be responsible? Not at all—I told her confidently as I headed upstairs. Up there, I discovered a tripped GFCI unit and simply reset it. Immediately, the lower floor’s outlet started working again, and everything had been done according to code.
To verify if your circuits have Ground Fault Circuit Interrupter protection, buy one. GFCI tester , which can be found at any hardware store or home improvement center.
Embedding Boxes Within Wall Surfaces
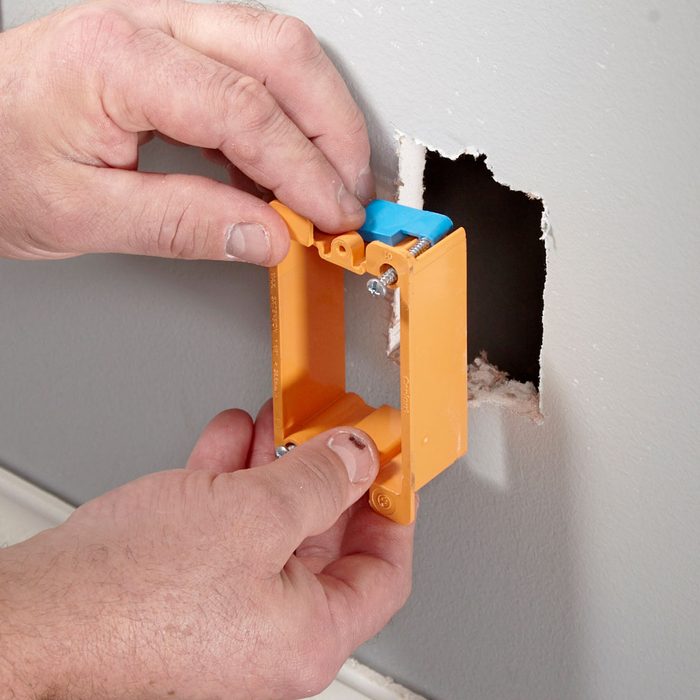
To reduce the risk of fire spreading, ensure that the enclosures for your light switches and outlets are level with or almost level with the final wall surface. For tiles, drywalls, and similar non-flammable surfaces, these boxes may be set back up to one-quarter of an inch. However, when dealing with wooden panels or other combustible materials, the boxes must align perfectly with the surrounding wall surface.
If you install an additional layer of wall material such as tiles, shiplap, or decorative stones, extend all electrical box faces to align with the outer surface of the new wall layer. electrical box extender .
Overfilling Electrical Boxes
A further fire risk to steer clear of is overcrowding numerous wires inside an electrical box. Since electricity generates heat, containing this heat within limits—thus minimizing the likelihood of a fire—is precisely what the NEC aims for. This implies that filling boxes beyond capacity should definitely be avoided. The consequences might include melted insulation, damaged electrical components, or even more severe outcomes.
The NEC limits the number of wires, devices, clamps and other accessories inside electrical boxes. This code requirement is called " box fill , and it depends on the capacity of the container. Every component is allocated a value according to the thickness of the wire within the enclosure, and these values should sum up to less than the total capacity of the box.
Since the NEC periodically revises box fill regulations, consult your local code enforcement agency to determine which guidelines should be followed. Additionally, purchasing larger boxes than strictly required is entirely acceptable. Future electrical workers will appreciate this consideration.

Installing a Ceiling Fan in an Incorrect Housing
Before becoming an electrician, I had a hilariously disastrous attempt at installing a ceiling fan. The biggest issue I faced was dealing with outdated knob-and-tube wiring However, another obstacle was the old electrical box in the ceiling, which wasn’t built to handle the load. Ceiling fans can be quite hefty and spin continuously, typically above your loved ones as they dine or rest. It’s crucial that such fixtures are adequately secured.
If your fan weighs 35 pounds or more, it needs to be supported by a listed A box labeled with the maximum load capacity should be used for installation. In cases where such a box isn’t available, ensure the ceiling fan has independent support from a ceiling joist or another sturdy structure. Additionally, fans weighing more than 70 pounds require separate support regardless of labeling.
Not Using Cable Connectors
The heat isn’t the sole factor that can negatively impact an electrical setup; friction is also a culprit. The wiring inside your walls, typically enclosed within what’s known as a cable, often experiences this issue. Romex , include a cover to minimize heat exposure and shield them from nicks and cuts that might lead to electrical arcs.
I lose count of the number of instances when I've unboxed materials only to discover Romex situated snugly—or sometimes tightly—against the jagged corners of a metal electrical enclosure. This spot of contact tends to degrade the protective covering over time due to continuous rubbing. Hence, employing a cable clamp becomes crucial for safety. Despite this, even those commonplace plastic enclosures found frequently in homes pose potential risks; however, they typically come equipped with built-in clamps as part of their design.
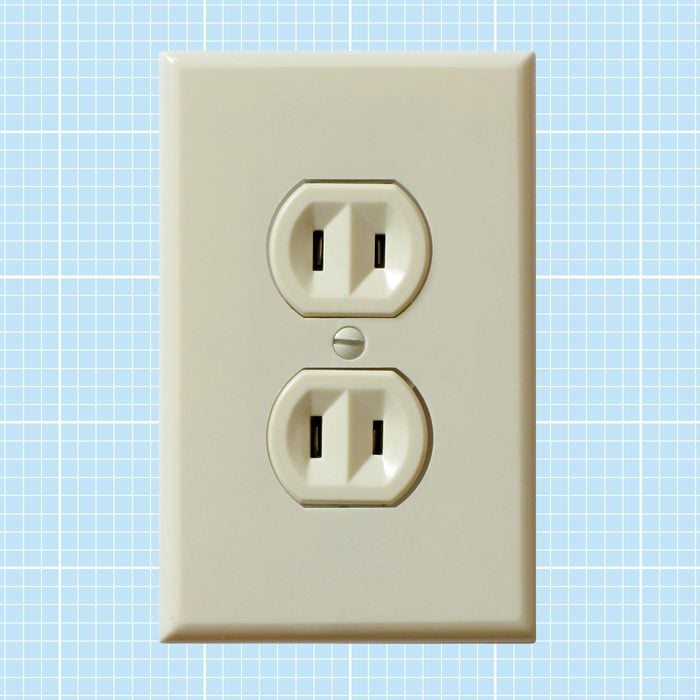
Replacing Two-Prong Outlets with Three-Prong
Have you ever knelt down to connect a three-prong device cable just to realize that the outlet only features two openings? Two-prong outlets include one live slot and another for neutrality, lacking the essential ground wire, which should correctly be termed as an “equipment grounding conductor.” Current safety regulations mandate having a grounded pathway returning to the main electrical box; however, older homes might still possess these outdated two-slotted outlets without this necessary grounding connection.
To update these electrical systems to meet current codes, an electrician might rewiring your home to add a grounding wire to each outlet. If budget constraints make this unfeasible, replace the two-slot outlets with GFCI receptacles , marking the front covers with “No Equipment Ground.” (Each GFCI includes labels for precisely this purpose.) Alternatively, install a GFCI circuit breaker or place a GFCI at the initial outlet to safeguard subsequent outlets further down the line, replacing the two-prong sockets with three-prong ones. Affix “No Equipment Ground” and “GFCI Protected” decals to the downstream receptacles.
Never swap out a two-prong for a regular three-prong, use an adapter, or break off the grounding prong on the cord (yeah, that happens). If you're adding GFCI, update the AFCI protection, too, by using combination AFCI/GFCI breakers or receptacles where appropriate.

Increasing Breaker Size Without Redoing Wiring
A circuit breaker that keeps tripping is essentially signaling an issue. This could either mean you have overloaded the circuit, or there’s a fault in the wiring. Regardless of the reason, you might consider replacing the breaker with a larger one to prevent further tripping. Resist this urge. Increasing the size of the breaker won’t identify why your wiring is problematic. Additionally, upgrading without resolving underlying issues can leave the current wire gauges vulnerable to damage. too small For the circuit breaker. This is a recipe for an electrical fire.
Properly sized wires and breakers are one of the most important concepts in electrical work, so hire a licensed electrician for matters concerning your electrical panel unless you really know what you're doing.

Betraying Rather Than Utilizing Screw terminals
Unlike selecting breakers and wiring, certain projects are highly beginner-friendly, such as swapping out a receptacle However, even when dealing with a simple task such as this one, certain industry techniques can be quite useful. To start with, utilize the screw terminals on switches and outlets instead of opting for the push-in connections.
Wires inserted directly into the rear connections of an outlet often become loose as they age. Such loosening may result in arcing, melting components, and even fires. To avoid this issue, bend one end of each wire into a loop shape facing clockwise. Securely attach these loops onto the screws at the terminals using a screwdriver for tightening. After securing them tightly, pull gently to confirm their stability. Finally, cover all the connected parts including the screws entirely with layers of electrician’s tape.

Reversing Hot and Neutral
When you turn on a lamp, electricity moves through the bulb via the hot wire and returns to the panel (and transformer) using the neutral wire. This circuit, or circuit It runs continuously until you turn it off. However, what if you inadvertently switched the hot and neutral wires? Your light would still function, but it would pose significantly greater safety risks. Here’s the explanation:
If you examine your lamp, the silver screw base where the bulb sits is considered the "neutral," whereas the "hot" connection is represented by a tiny tab located beneath the bulb that makes contact with its bottom end. If this wiring configuration is reversed at the light socket, it still forms a complete loop; however, the "hot" wire will then be connected to the silver screws rather than being concealed underneath the bulb. This setup could lead to an electric shock for whoever changes the bulb later on.
In modern home electrical systems, the live wire is typically colored black or red, whereas the white one serves as the neutral. If your outlet features terminal screws, connect the live wire to the brass-colored screw and the neutral wire to the silver-colored one. In cases where cords do not have distinctively colored wires—such as with a lamp cord—the smooth conductor acts as the live wire, while the neutral can usually be identified by ribbing, grooving, or another form of marking along its length.
Avoiding a Certified Electrical Technician
Avoid taking chances with your safety. It’s wise to have an experienced electrician check out recurrent breaker trips, noisy appliances, fluctuating light brightness, unusual odors, burn indicators, or damaged equipment. Before you examine these issues personally, be sure to switch off the electricity and confirm that there is no current flowing through the circuits.
Post a Comment