

We all aim to improve ourselves. curb appeal While maintaining low expenses and minimizing project duration, tasks like painting your mailbox become feasible weekend activities, requiring minimal effort and resources. Prior to starting, ensure you’ve checked the weather report; avoid getting rained on or working when temperatures dip below 50 degrees or rise above 90 degrees Fahrenheit.
The fastest and simplest way to paint a mailbox is by using spray paint; however, this should be done outdoors or in a highly ventilated room, not indoors. For my metal mailbox, I opted for a glossy black protective enamel spray paint to provide additional resistance to weather conditions. Removing the mailbox was effortless, though I had to replace several corroded screws in the process.
The key to achieving an excellent-looking painted mailbox lies in thorough preparation beforehand. This involves fixing dents, removing dirt, and addressing any signs of rust. To my surprise, there was significantly more rust present, which required additional cleaning efforts. In future projects, I will ensure not to handle the sprayed surface until after the last coat has fully dried and set. Since I ended up having to touch up some smeared areas with another layer of paint, patience proved crucial—resist the urge to hurry through this process!
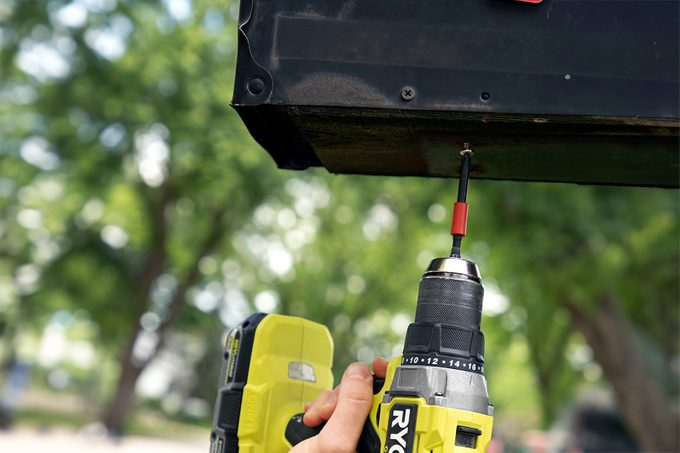
Detach the mailbox
Remove the mailbox from the post. mailbox post Use a drill to loosen it from beneath. Ensure you keep the screws safe since they'll be needed again when putting the mailbox back up. If removing the mailbox isn’t an option, shield the post using a plastic painter’s cover.
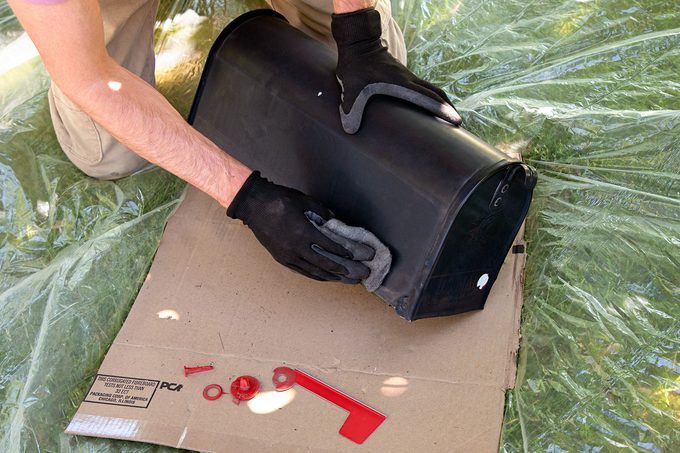
Prepare a work area
Place a plastic sheet along with some cardboard underneath the mailbox. Should you find it necessary, the cardboard will facilitate moving the mailbox as it dries.
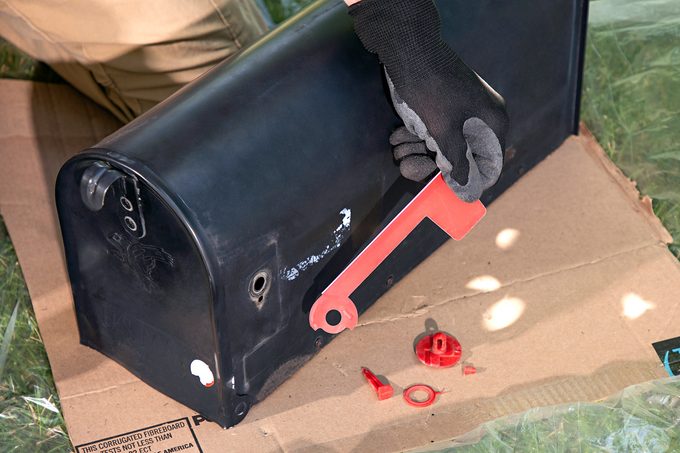
Remove the flag
Take down the flag from the mailbox.
Remove the rust
Clean the area by eliminating rust with a wire brush or steel wool. Use a putty knife to remove any residual stickers from the mailbox.
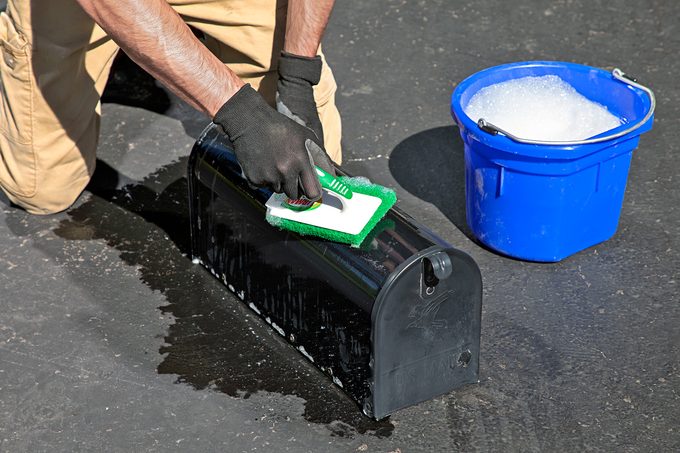
Clean the mailbox
Take a clean sponge and soak it in soapy water to cleanse the mailbox. Afterward, rinse it thoroughly and dry using a fresh cloth. microfiber towel .
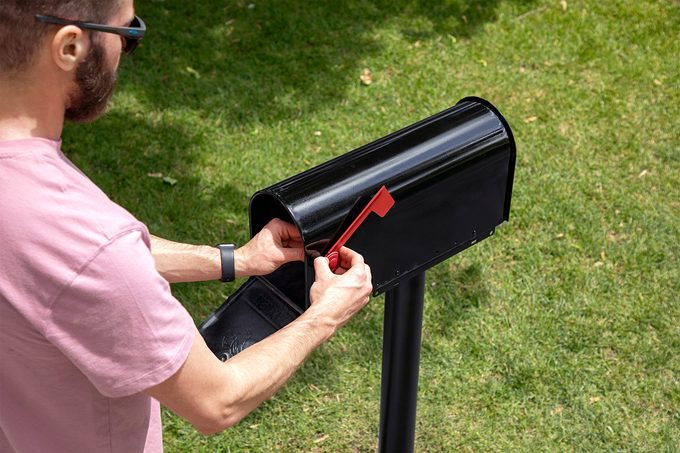
Set up the mailbox and raise the flag
Apply a light layer of primer onto the flag using spray, followed by spraying the mailbox with primer as well. Depending on coverage quality, you might have to administer two layers. For spots requiring extra attention, add an additional coating of primer.
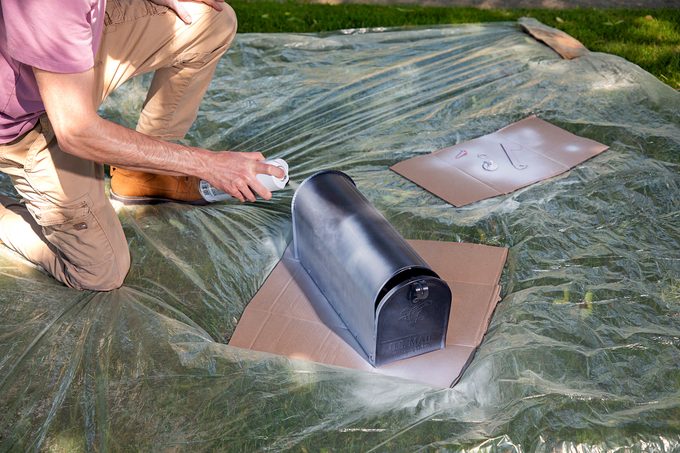
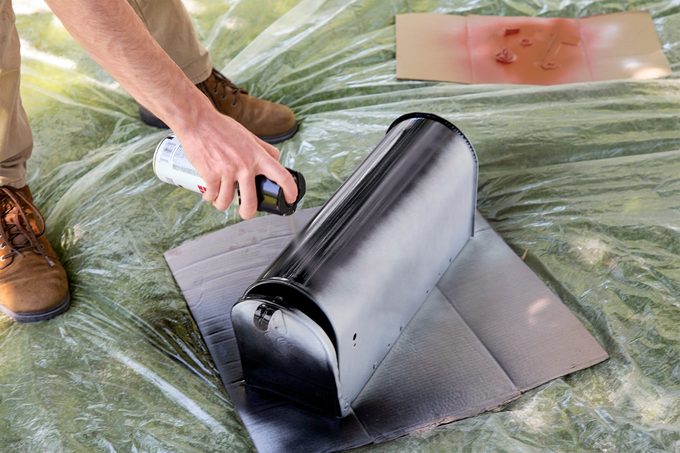
Color the mailbox and flag
After the primer has dried, cover the whole mailbox with two light layers of black spray paint. Next, use red spray paint to put two light layers on the flag as well. Applying two coats ensures complete and uniform coverage.
Wait for the mailbox to be fully dry before proceeding. Next, use a drill to proceed with your task. install the mailbox Back onto the post using screws.
Attach the flag back to the mailbox in the photograph.
Once fully dried, rehang the flag on the mailbox.
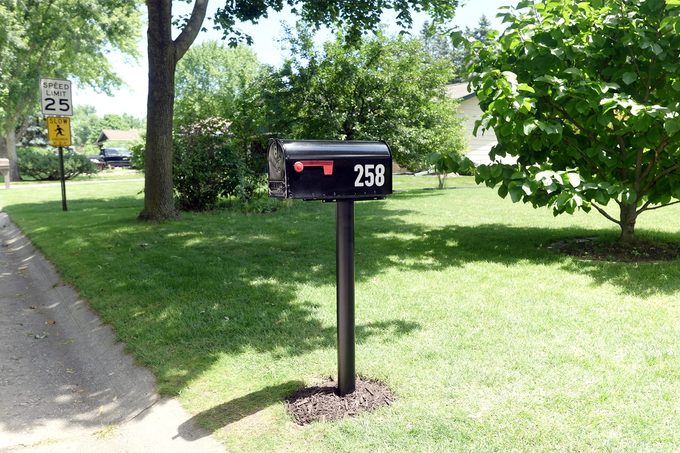
Attach address numbers
After painting your mailbox, remember to add your house number.
For those who live in a city or town, the U.S. Postal Service regulations Indicate that each curbside mailbox must show the house number "in a contrasting color with clean lettering and numerals at least one inch tall." For those residing in remote areas, displaying the street or highway name on the mailbox might also be necessary. Ensure this information is clearly seen from the direction where carriers usually approach, either on the side of the box or on the mailbox door if several boxes are clustered together.
FAQ
What steps should be taken to remove address stickers from a mailbox?
To prevent scratching or damaging the mailbox, carefully remove the numbers using a plastic putty knife. Should you find any residual adhesive left behind from the sticky numbers, apply an adhesive remover like Goo Gone.
Is it necessary to apply a primer before painting a mailbox?
Certainly, you should apply a primer prior to spray painting the mailbox for optimal outcomes. The primer helps the spray paint adhere properly to the surface and improves the final appearance of your painted project.
Post a Comment